Diaper Changing Hacks: 35 Tips I Wish I Knew with My First Baby
Looking for tips to make changing your baby’s diaper easier? These 35 tried-and-true mom hacks will save you time, energy, and money! After 7 years of changing diapers, these are the tips I wish I knew earlier!
Diaper Changing Hacks
1. Onesie Flaps
This is one that I found most helpful. Around the neck of onesies, you will see they stretch. This is meant if your baby has a blowout you can stretch it over their shoulders and pull it down, vs go over the head. This will save a TON of mess when you clean up those tough jobs.
2. Wait
Don’t rush to change a dirty diaper, give it a few minutes to ensure they are not done. If you change too soon you could end up with a mess while you are changing them. Or you will find you dirty multiple diapers.
✅ CLICK HERE for the easiest way to SAVE $$$ ON DIAPERS (NO CLIPPING COUPONS REQUIRED)–Take it from a mom of four! This is the cheapest way to ALWAYS HAVE DIAPERS ON HAND 🙂 We have always had two kids in diapers, so I know how important it is to save on diapers wherever you can, and I do not have enough time in the day to be cutting out and remembering coupons!
3. Butt Paste
When you go to apply butt paste, don’t use your fingers. That makes a mess when you go to fasten the diaper or to catch a squirmy baby to get them to sit still to finish up. Use a baby wipe or even toilet paper to squirt the cream on, then use that to wipe onto their bottom. It spreads nice and you have clean hands.
They have spatula applicators you can buy so you keep your fingers clean–this one comes in a pack of two so you have one for your primary diaper changing station and one for your portable diaper station!
4. Diaper Ruffles
Make sure you pay attention to the ruffles on the sides of the diaper. Make sure they are all pulled out, so they will help to stop any leaks your little one might have. Sometimes when they fold in that alone can be the cause for not holding things in when they go.
5. Nighttime Gowns
Boy or girl these nighttime gowns are so handy. They are open at the bottom so all you have to do is roll it up and change for a quick and simple diaper change. Don’t mess with zippers or buttons and chance waking up the baby even more.
6. Portable Diaper Changing Station
This is great to have in a few rooms in your home. You can have a little basket or container that has all your essentials in it for a quick diaper change. If you end up needing to move it to another room it is so easy to grab and carry. This is a game-changer.
7. Changing a Boy
If you have a boy you will want to ensure his penis is pointed down in the diaper. If it is not when he pees it is almost a guarantee he will pee out of the diaper!
8. Doggie Bags
Doggie bags are cheap and great for placing dirty diapers in to help hold in the smell. Use these in your diaper bag and even at home.
9. Nightlight
When your baby has a dirty diaper in the middle of the night you don’t want to turn on all the lights! Keep your baby somewhat asleep by using a nightlight to provide just enough light to change their diaper! This nightlight is brand new and does the job of three different machines!
10. Sealable Wet Bags
Stash a few sealable wet bags in your diaper bag, so if your little one has a mess and needs a change you can toss close into the bag and seal it up. This will help keep your diaper bag clean and prevent other items from getting soiled. We have had this exact one for seven years and it’s never leaked ONCE!
11. Coconut Oil for Meconium
Your newborn’s first stools will be tarlike. Use coconut oil to help remove all the meconium off their bottom without rubbing too hard on their gentle bottom.
12. Changing Pad Liners
In the beginning, you will have A LOT of messes. Consider buying a handful of changing pad covers (three pack under $10) to keep in rotation as they are getting washed. Or skip the cover and use the plastic-covered pad like this one which is a reader favorite (and doubles as a baby scale!) If you keep it plastic you can then wipe it clean really easy, and no washing required.
13. Diaper Changing Toys
Keep your wiggly toddler busy with toys that they only get to play with when they get their diaper changed. This is my kids’ favorite toy and I promise it will keep them entertained easier then wiggling all over the table.
14. Wetness Indicator
You can see the blue line above on the diaper–that means it’s wet!
Don’t know whether the baby peed in their diaper or not? Pampers and Huggies both have wetness indicators. Yellow means dry, and when it turns blue it means it is wet.
15. Portable Diaper Caddy
Save yourself running up and down the stairs a million times a day by making a portable diaper caddy or a portable diaper changing station. We use this in our own house, and actually have three diaper stations when we have a newborn (one downstairs in the playroom, one in the nursery, and one in our master bedroom.)
16. Return Unused Diapers
If you haven’t used a box of diapers and your toddler outgrows them before you use, exchange them for the right size. Just take it back to the store and swap. This will help to save you money. Only open what you are using at the time so that if you don’t need all the diapers you can swap for the correct size.
17. Ointment and cream at night
If you are concerned about your baby getting a diaper rash, or skin sitting in a wet diaper through the night, make a waterproof barrier with butt paste or Aquaphor. This will keep your baby’s butt dry and comfortable. This is the most economical way to buy Aquaphor and the easiest to apply!
18. Extra Cream At Night
Lather on extra cream at night to make baby most comfortable especially if your baby has a sensitive bottom!
19. Baby Bottom Wash for Blowouts
Ever feel like you need a million diaper wipes to clean up a blow-out diaper? Save the wipes (well, us a couple) and then use a baby bottom wash spray (this exact one is our family’s favorite–it’s been used for four kids!) This will get the area wet, and is easier to clean up with a wet one then! Think of it as a mini butt bath!
20. Infant Potty Training:
After they wake up and after they feed, put your baby on the potty! I swear it’s not hard–we did this with our first baby and saved a ton of cloth diapers from getting dirty. We also were able to quickly fully potty train her at 24 months then!
READ this book if you are interested in learning more about infant potty training.
21. Stinky Diapers? Flush the Poop!
The easiest way to make sure your house doesn’t smell of baby poop? Get rid of it! When your baby does a poop; instead of throwing the whole thing in the garbage, throw the poop in the potty and flush it! You’ll be amazed at how much better your house smells!
22. Natural Odor Absorber
Skip expensive scented diaper garbage bags and use these reusable 100% natural odor absorbers! We have ten of them and I use them all over our house–I put them out in the sun once a month for an hour to “recharge and air out!” Stick one of these behind your baby’s diaper can, or tape it to the top of your baby’s trash can to absorb the stinky smells!
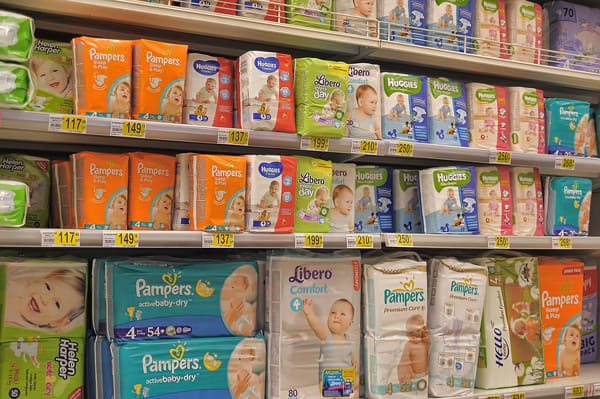
Hacks to Save Money on Diapers
Some of the best diaper changing hacks are how to save money on them–because no one wants to literally throw money in the garbage! The average family will spend $70-80 on diapers per child per month–that’s nearly $900 a year! Use these easy hacks to save some of that moolah! We’ve been able to save hundreds of dollars over the year!
22. Buy One Refill Container & Save Money
We use this diaper wipe dispenser (and have for SEVEN YEARS–it still works flawlessly!) and just refill it with wipes every week or so. By skipping the expensive “flip top” diaper wipes containers, we’ve saved a ton of money over the years!
23. Subscribe & Save
We have used this service for seven years (ahem–4 children in diapers!) and literally saved hundreds of dollars. It requires ZERO coupon cutting which is a win in my book! Hack: If you have a couple subscribe and save items in your cart and haven’t reached the threshold–subscribe to hair ties! They are a few dollars and will save you 20% on all your subscribe & save items!
✅ CLICK HERE for the easiest way to SAVE $$$ ON DIAPERS (NO CLIPPING COUPONS REQUIRED)–Take it from a mom of four! This is the cheapest way to ALWAYS HAVE DIAPERS ON HAND 🙂 We have always had two kids in diapers, so I know how important it is to save on diapers wherever you can, and I do not have enough time in the day to be cutting out and remembering coupons!
24. Skip Fancy & Expensive Garbage Bags
You don’t need special “on brand” garbage bags for your nursery trash can. While they might look nice, the regular ones work just as well. We’ve used them with this exact baby diaper pail and heard great reviews about this one as well!

25. Reuse a hard box wipes container
We have two diaper stations in our house–one uses the OXO diaper wipes container and the other just uses a reusable Huggies diaper box. We’ve had it for 6 years! Save the extra cash setting up your portable diaper changing station and just reuse a hard-sided diaper wipes container!
26. Cloth Diaper
We used cloth diapers almost exclusively with our first, about 75% with our second child, and 25% with our third (and zero with our fourth 🙂 Just in the first year with our first child, we saved nearly $200 using cloth diapers, and then saved 1K every year after that! These are my favorite relatively inexpensive reusable cloth diapers that have held up over 7 years.

DIAPER HACKS ON-THE-GO
27. Keep your diaper bag stocked
Create a daily routine to check your diaper bag (and replenish any needed supplies) so it’s always ready when you want to run out the door! No stopping and guessing what you forgot!
28. Car diaper changing station
Use a small basket, throw in a washable blanket or diaper changing pad, some wipes, and diapers and you have a fantastic car diaper changing station! It’s most convenient to keep in your trunk if you have an SUV or a second row in you have a sedan (so you can change the baby there.) This is also a great place to keep an extra set of clothes for any older potty-trained kids (in case of accidents!)
29. Sanitize the Diaper Station (or Use Your Lap)
Keep sanitizing wipes for your diaper bag or use your lap (my preference!) I have used a diaper changing station exactly twice in my life! I’d much rather use my stroller, my car, or even my lap for a diaper station.
THINGS TO SKIP…
30. Don’t waste your money on Pee-Pee Tee-Pees
Instead of spending nearly $30 on expensive pee pee tee-pees, use cut up burp cloths! It is a fraction of the cost! They might not be as cute; but, who cares when you are changing your baby’s diaper!
31. Baby Powder
One thing you won’t find anymore is baby powder–while it was touted for its uses when we were kids; they have linked using baby powder to the development of cancer. So, skip it! If you are having a hard time with diaper rash, increase the frequency of changes, and let them have some bare bottom time on a waterproof mat.
32. Baby hands immobilizers
Baby hands + poop = YIKES! Even though they have invented a solution for this, it really isn’t necessary to buy. I have four kids and have never once used a baby hands immobilizer. Give your baby a toy to play with instead. Believe me, you’ll get really fast at diaper changes by the time they get handsy!
33. Expensive changing table
Diaper changing tables are one of the most overpriced and underused pieces of furniture in a nursery. Skip the expensive changing table, and strap a changing cushion to the top of a dresser! You can also use the top of a bed (with a changing mat), or a spot on the ground. It doesn’t matter what you use–but you do not need to use a pricey changing table!
34. Disposable changing pads
Help the environment and skip the disposable changing pads. Not only are they EXPENSIVE; but, they are totally unnecessary. Buy one pack instead of three reusable waterproof changing pads and you are set for life! We have successfully used a total of TWO reusable waterproof changing pads for our four kids for the last seven years and had zero issues!
35. Chemical Air Fresheners
The thought of an air freshener in a nursery gives me goosebumps! Chemical air fresheners are horrible for your health and especially for your baby. If you feel like your nursery smells of dirty diapers do the following: 1) increase the frequency of emptying your trash 2) buy a charcoal air absorber 3) open up the windows regularly. Plus, baby poop doesn’t really start to smell bad until they start eating solid foods!
If you want to add some lovely fragrances into your nursery, then think about diffusing child-safe essential oils. We have enjoyed using Gentle Baby, Sleepyize, and Lavender from Young Living.
If You’re Planning on Circumcising…
35. Petroleum Jelly, Gauze, Peri bottle
If you plan on circumcising your son, you’ll want the following items at each of your diaper stations: petroleum jelly, gauze, and a peri bottle. You’ll use these for the first two weeks while the circumcision heals and having the supplies both at your diaper changing station and in your portable diaper caddy will help enormously!
In Conclusion:
Hopefully, you’ve gained a few new to you hacks for diaper changing! Even though it may seem overwhelming at first, I promise after the first week you’ll feel like a pro! And don’t worry–newborns go through what seems like a million diaper changes a day (on average about 16), it won’t last forever!